


Hell Let Loose: Vietnam

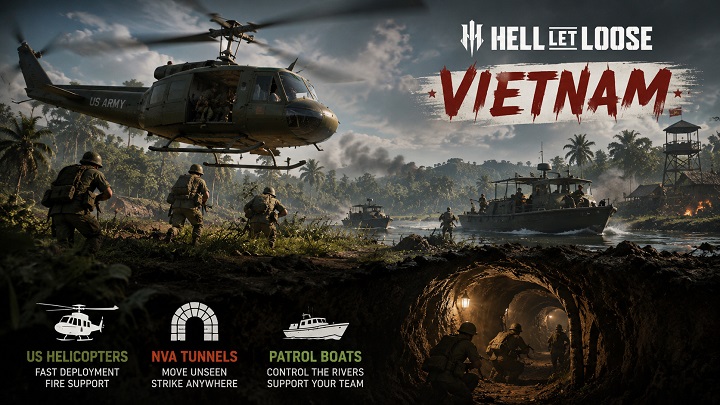
Hell Let Loose: Vietnam officially launched on August 13, 2026, for PC, PlayStation 5, and Xbox Series X|S. This standalone 50v50 tactical FPS features six large-scale maps, four game modes, 17 specialized roles, US helicopters, NVA tunnel networks, and armed patrol boats. Players ready to enter its intense, teamwork-driven battlefields can Buy Hell Let Loose: Vietnam CD Keys and prepare for a demanding combat experience where communication, positioning, and reliable spawn points are often more important than individual kills.
Hell Let Loose: Vietnam Release Details
Hell Let Loose: Vietnam launched worldwide on August 13, 2026. The table below summarizes the confirmed release information and launch content from the official announcement and Steam store page.
| Category | Official Details |
|---|---|
| Release Date | August 13, 2026 |
| Platforms | PC, PlayStation 5, and Xbox Series X|S |
| Battle Scale | 50v50 multiplayer battles with cross-platform support |
| Launch Content | Six large-scale maps, four game modes, and 17 specialized roles |
| US Forces | Helicopters provide troop transport, supply delivery, and battlefield support |
| NVA Forces | Tunnel networks enable concealed movement and surprise attacks |
| Other Major Features | Armed patrol boats, swimming, climbing, fast crawling, casualty dragging, and a 3D tactical map |
All Six Launch Maps
The official launch map overview describes six battlefields covering bridges, rivers, flooded terrain, airfields, ports, villages, and mountainous jungle.
| Map | Environment and Tactical Focus | Historical Inspiration |
|---|---|---|
| Thanh Hóa Bridge | River crossings, jungle, mountains, villages, rail facilities, and bridge assaults | Operation Rolling Thunder and the heavily defended Dragon’s Jaw bridge |
| Huế Outskirts | Terraced farms, jungle-covered heights, US bases, industrial areas, and vertical combat | The approaches to Huế during the Tet Offensive |
| Vạn Tường | Villages, semi-urban terrain, jungle, and a sprawling river network suited to boat flanks | Operation Starlite |
| Quảng Ngãi | Flooded lowlands, cliffs, caves, bamboo forest, and strong elevation changes | Operation Piranha |
| Đắk Tô Airfield | A long, exposed runway offering strong sightlines for armor, machine guns, and reconnaissance | The Battle of Đắk Tô |
| Cam Ranh Port | Fortified facilities, docks, dunes, dry creek beds, and waterways supporting patrol-boat combat | The military port environment around Cam Ranh Bay |
How the Four Game Modes Work?
Before entering a match, players should understand three official capture terms:
Hard Cap: The marked circle directly surrounding a capture point.
Soft Cap: The four grid squares forming a 2x2 area around an objective.
Sector: A 2x8 section of the map containing one of the five capture points.
Warfare
Both teams begin with control of their respective sides, while the middle sector starts neutral.
Teams must capture sectors and push the frontline toward the enemy headquarters.
Each player inside the Soft Cap contributes one unit of capture strength.
Each player inside the Hard Cap contributes three times the capture strength.
An uncontested objective takes three minutes to capture.
A team wins by capturing the enemy headquarters sector or controlling most sectors when the 90-minute limit expires.
Offensive
One team attacks while the other defends.
Attackers must capture five objectives in sequence and eventually secure the defending team’s headquarters sector.
Attackers have 30 minutes to capture each active sector.
Capturing a sector resets the timer to 30 minutes.
Defenders cannot retake a sector after losing it.
Only players inside the Hard Cap contribute to capture progress.
Attackers win by taking all five objectives, while defenders win by holding any active objective until its timer expires.
Conquest
Capture points are arranged in a cross-shaped layout and can be attacked in any order.
Both teams begin with a limited amount of Morale.
Redeploying onto the battlefield reduces the team’s Morale.
Morale also gradually decreases according to which team controls most capture points.
A team normally wins by holding the majority when its opponent runs out of Morale.
If the team holding the majority runs out of Morale first, the match enters Overtime. The opposing team must then secure the majority before exhausting its remaining Morale.
Domination
Three capture points are available across the central sectors.
A team must control at least two of the three points to unlock the opposing headquarters.
Capturing the enemy headquarters immediately wins the match.
If a team loses control of the majority while attacking the headquarters, that headquarters becomes locked again.
Soft Cap players contribute one unit of capture strength, while Hard Cap players contribute three times as much.
If neither headquarters is captured, the team controlling most central points when time expires wins.
All 17 Launch Roles and Their Responsibilities
The current Steam listing confirms 17 distinct roles across six battlefield units. This is important because some older promotional material mentioned a different number. The live launch listing should be treated as the current reference.The table below combines the official role names with a concise description of each role’s practical battlefield focus. Equipment and loadout options can differ by faction or progression.
| Unit | Role | Main Battlefield Focus |
|---|---|---|
| Command | Commander | Coordinates the whole team, communicates with unit leaders, and establishes the overall plan |
| Infantry | Squad Leader | Leads an infantry squad, communicates orders, marks threats, and manages forward squad positioning |
| Infantry | Rifleman | Provides straightforward frontline firepower and is a suitable role for learning basic combat |
| Infantry | Grenadier | Uses explosive and smoke grenades to pressure cover, screen movement, and support assaults |
| Infantry | Engineer | Builds resource nodes, defenses, and other useful structures when supplies are available |
| Infantry | Medic | Revives casualties and helps keep a squad active during an attack or defense |
| Infantry | Specialist | Handles specialized infantry duties and equipment depending on the available loadout |
| Infantry | Machine Gunner | Suppresses enemy positions and controls roads, clearings, bridges, and other approaches |
| Recon | Spotter | Leads the reconnaissance element, observes enemy movement, and helps identify valuable targets |
| Recon | Sniper | Engages exposed enemies from longer range and supports reconnaissance operations |
| Armour | Tank Commander | Directs the armored crew, selects targets, and coordinates vehicle movement |
| Armour | Crewman | Operates armored vehicles as driver, gunner, or another assigned crew position |
| Helicopter, US Only | Logistics Officer | Coordinates helicopter-related logistics and helps turn successful landings into useful forward positions |
| Helicopter, US Only | Pilot | Flies helicopters for transport, supply delivery, extraction, or battlefield support |
| Mortar Squad | Observer | Identifies targets and helps direct the mortar team’s indirect fire |
| Mortar Squad | Support | Assists the mortar unit with the resources and coordination needed to remain operational |
| Mortar Squad | Gunner | Operates the mortar and delivers indirect fire onto marked or communicated targets |
The full official classification can be checked on the Steam game page, while Team17 has also published an official gameplay roles showcase.For a first match, Rifleman, Medic, or Engineer are sensible choices. Rifleman provides a relatively direct introduction to movement and combat. Medic allows a player to follow an experienced squad and learn how firefights develop. Engineer introduces the supply and construction systems that frequently decide matches.Commander, Squad Leader, Pilot, and Tank Commander carry greater responsibility. The Commander and Squad Leader tutorials must be completed before those roles can be selected, according to the official launch information.
US Helicopters and NVA Tunnels Change the Frontline
The factions are deliberately asymmetric rather than identical armies with different uniforms.
US forces use helicopters for rapid troop movement, supplies, and fire support. A well-organized helicopter landing can move a squad across the map and open an unexpected attack route. However, landing directly beside a defended objective can expose the aircraft and reveal the team’s plan.
The NVA relies on tunnel networks for concealed movement. Following pre-release tests, the developers made several balancing changes:
Tunnel cooldown increased from two to five minutes
Maximum distance between connected tunnels reduced from 800 to 400 meters
Tunnel travel and entry times increased
Tunnels are destroyed when their territory changes to enemy control
The distance check around tunnel placement increased from 50 to 100 meters
These restrictions make tunnel placement a strategic decision. NVA squads must defend tunnel locations and move the network as the battle shifts.Both factions also use patrol boats to move infantry through rivers and threaten land-based defenses. Some boats can support mobile spawning, while NVA boats can transport and deploy supplies. Rivers should therefore be treated as active attack routes, not decorative boundaries.
Essential Beginner Tips
Complete the Tutorials
The Getting Started tutorial can be skipped, but beginners will benefit from completing it. Commander and Squad Leader have mandatory role tutorials because mistakes in those positions can affect dozens of teammates.
Stay With the Squad
Do not run toward every gunshot. Follow the Squad Leader, attack the assigned objective, and remain close enough to receive information. A coordinated squad can revive casualties, combine smoke with suppressive fire, and protect its forward spawn.
Treat Spawn Positions as Strategic Assets
Players cannot simply respawn on any surviving teammate. Teams depend on headquarters locations, Garrisons, Squad Leader Outposts, tunnels, and applicable vehicle or faction spawn systems.
When an enemy spawn is discovered:
Report its direction and location
Mark it on the tactical map
Check the surrounding area for defenders
Destroy it instead of chasing isolated enemies
Expect another enemy wave if a second spawn exists nearby
Removing an enemy spawn can be more valuable than collecting several kills.
Use Clear Communication
A useful report includes direction, enemy type, number, and distance. “Enemy infantry, southwest, three players near the tree line, approximately 80 meters” gives the squad information it can immediately use.
Prioritize reports involving:
Tanks and armored vehicles
Helicopter landing zones
Tunnel entrances
Enemy spawn positions
Patrol boats
Large infantry movements
Requests for smoke, supplies, or medical assistance
Move Carefully in Dense Vegetation
Jungle cover can conceal enemies, but vegetation movement and sound can also reveal them. Move between cover, stop to observe, and avoid firing repeatedly from one position. Before crossing a runway, road, bridge, or clearing, use smoke and coordinate covering fire rather than relying on speed alone.
Learn the Active Mode
Check the tactical map before deploying. In Offensive, only the Hard Cap contributes to capturing an objective. In Conquest, repeated redeployment consumes Morale. Understanding that single rule may help the team more than improving personal shooting accuracy.
Final Advice
Success in Hell Let Loose: Vietnam depends on teamwork, logistics, and reliable information. Players looking for Cheap Hell Let Loose: Vietnam CD Keys can prepare to enter a demanding 50v50 battlefield where choosing a familiar role, communicating clearly, protecting forward spawns, and watching rivers and rear areas are essential. Building a useful node, reporting an enemy tunnel, reviving a squadmate, or securing a helicopter landing zone may contribute more to victory than achieving the highest kill count. Master these fundamentals first, and every battle will become easier to understand and far more rewarding.









SUPPORT
LEGAL
Policies






 USD ($)
 English
  Help Center