


Mortal Shell II


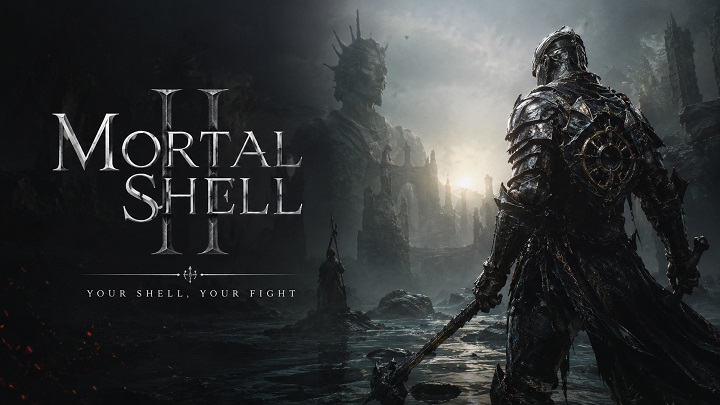
Mortal Shell II significantly expands the original game with eight playable Shells, a compact interconnected open world, ranged Sidearms, deeper weapon upgrades, and dozens of hidden dungeons. Although it follows many Soulslike conventions, several systems work differently from what new players may expect.Most importantly, combat is not restricted by a stamina bar. Players can attack, dodge, and sprint freely, but recovery animations, enemy posture, positioning, and defensive timing remain essential. The official website describes the combat as fast and flexible, with players using melee weapons and Sidearms to break enemy posture before landing critical attacks.This beginner guide explains how to choose an early Shell, manage currencies, use Seals, upgrade healing, cleanse Beacons, develop Tarstones, and avoid wasting valuable resources. If you're preparing to start your journey, you can also Buy Mortal Shell II CD Keys before diving into the game's early challenges.
Recommended Early-Game Priorities
| Priority | What to Do | Why It Matters |
|---|---|---|
| 1 | Install the latest update | Launch patches change enemy health, weapon damage, and the economy |
| 2 | Enable automatic Gold pickup | Prevents small Coin drops from being missed |
| 3 | Find Tiel or Proxima | A proper Shell provides abilities, defenses, and a skill tree |
| 4 | Practice Harden and Perfect Harden | Builds enemy Break while preventing damage |
| 5 | Activate and cleanse Beacons | Provides checkpoints, Ova, Glimpses, and other rewards |
| 6 | Spend Gloom regularly | Gloom is left behind when you die |
| 7 | Upgrade Mether’s Pulse | More charges and stronger healing improve survivability |
| 8 | Focus on one main Shell | Spreading Glimpses too widely slows Shell Bond progression |
| 9 | Rotate equipped Tarstones | Multiple Tarstones must be developed to support later upgrades |
| 10 | Test weapons before investing | Upgrade materials are more valuable than small early stat differences |
Before beginning, make sure the game is fully updated. Cold Symmetry released multiple stability fixes during the Advanced Access period, followed by Balance Patch 1 around the worldwide launch.
The patch made several changes that directly affect new players:
Enemy Gold drops were significantly increased.
Enemies in Mammon now drop twice as much Gold.
Smelting a weapon at the Tarforge costs 75% less Gloom.
Shell locations shown on the map now cost Gloom instead of Glimpses.
Previously spent Glimpses are refunded at the Shell Keeper’s alcove.
The Great Martyr’s Blade received 20% more attack damage.
The Troubadour’s Lute received 100% more attack damage
Guard can now be used while walking.
-
Several early enemies and bosses received health or damage reductions.
Some launch guides still describe mechanics from the Open Beta or pre-patch version. In particular, do not follow older advice telling you to spend Glimpses to reveal Shell locations.
Enable Automatic Gold Pickup
One of the most useful settings is “Auto Pick Up Gold.” With this enabled, walking over dropped Coins automatically adds them to your inventory. This is especially useful in swamps, dark ruins, crowded encounters, and areas where small drops can disappear into the environment.Gold is used for merchants, equipment improvements, Tarstone development, and Tarforge services. The latest balance patch makes enemies more rewarding, so automatically collecting every drop can produce a noticeable difference over an entire playthrough.Gold is separate from Gloom. Gold supports equipment and purchases, while Gloom is primarily associated with Harbinger progression and certain service costs.
Find a Proper Shell as Soon as Possible
After completing the prologue and reaching Marrow Keep, the approximate locations of Tiel and Proxima should become available. Look for one of them before attempting difficult open-world encounters.The Harbinger can fight without inhabiting another warrior, but Shells act as the game’s classes. Each provides distinctive abilities, attacks, defensive traits, memories, and a Shell Bond skill tree.
According to the current GamesRadar Shell guide, the eight playable Shells are:
Tiel, the Acolyte
Proxima, the Broodseeker
Eredrim, the Venerable
Gragu, the Insatiable
Smert, the Apostate
Lazlo, the Justiciar
Sariel, the Endless
Sester Genessa, the Wayward
Tiel is a strong early choice for players who prefer speed, evasive movement, and cloaking. Proxima offers a more balanced style, with damage mitigation and Bio Sampler-a move that helps her quickly close the distance to an enemy. Eredrim is commonly recommended later for players who prefer durability and direct melee combat.Experiment with Tiel and Proxima before committing valuable resources. Neither is universally best because the right Shell depends on whether you favor mobility, defense, Ripostes, elemental effects, or aggressive melee attacks.
Focus Your Glimpses on One Main Shell
Glimpses are used to increase Shell Bond and open deeper sections of a Shell’s ability tree. They are considerably more limited than ordinary Gold or farmable Gloom, so investing in every Shell at once can leave all of them underdeveloped.
A safer progression plan is:
Test the first two available Shells.
Select one main Shell for early and mid-game content.
Invest Glimpses into that Shell’s Bond.
Unlock abilities that complement your preferred weapon and Seal.
Develop a second Shell only after your primary build becomes reliable.
Shell Points can be reassigned, allowing you to alter individual abilities for a difficult boss. Shell Bond investment is a more important long-term decision, so avoid spending Glimpses simply because a new Shell has become available.
Learn What Your Seal Actually Does
Seals determine which defensive or support action your character can perform. Harden, Guard, and Parry should not be treated as three default abilities that are always available.Vatra’s Seal grants Harden. It lets the character turn solid and absorb an incoming attack. When timed precisely, Perfect Harden also deals Break Damage to the attacker.
Try this basic sequence:
Begin a melee attack.
Watch the enemy’s counterattack.
Harden before the counterattack connects.
Absorb the hit without abandoning your attack.
Continue applying pressure after the enemy recoils.
This technique is particularly effective with slow or heavy weapons because Harden can protect you during a long attack animation.Other Seals support conventional Guard or stricter Parry mechanics. Perfect Guard and successful Parry actions can produce more Break Damage, but their timing may be less forgiving. Practice each Seal against a repeatable basic enemy before taking it into a major boss fight.
Use Break Damage to Create Ripostes
Enemies have a gold Break bar underneath their health. Reducing this bar is often more effective than relying entirely on direct damage.
Break Damage can come from:
Perfect Harden
Perfect Guard
Successful Parries
Heavy weapon attacks
Sidearm attacks
Shell abilities
Certain Tarstones
The Slayer Seal
When the Break bar is emptied, a red indicator appears on the enemy. Move in and perform a Riposte to trigger a powerful execution. Ripostes deal heavy damage and can activate healing, Resolve recovery, or other build effects.Do not attack continuously just because the game has no stamina bar. Recovery animations can still leave you exposed. A short attack sequence followed by a planned Harden, Guard, or dodge is safer than repeatedly committing to a long combo.
Activate and Cleanse Every Beacon
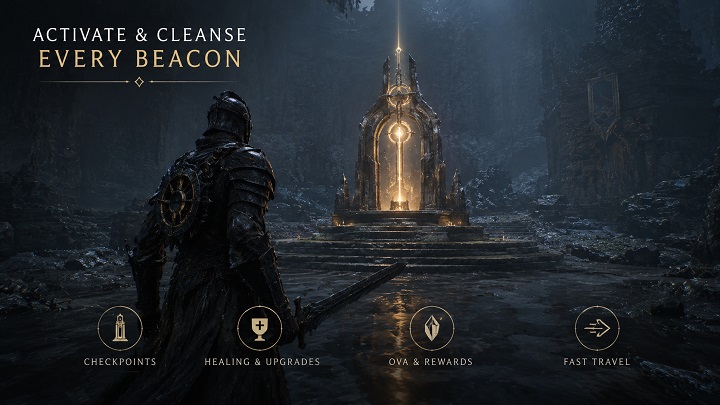
Beacons function as checkpoints, upgrade locations, healing refill points, and travel nodes. Many also contain small internal dungeons that must be cleansed.
Cleansing a Beacon may involve:
Entering the space beneath or inside it
Defeating groups of enemies
Solving a short navigation challenge
Fighting a miniboss
Removing corruption around an Ova
Claiming weapons, Tarstones, Glimpses, or upgrade materials
A small number of Beacons are already cleansed when discovered, so the absence of a “Cleanse” option does not automatically indicate a bug.Ova obtained from Beacons should be returned to the Gloom Siphon in Marrow Keep. After sufficient progress, players receive Mether’s Breath, which supports faster movement between discovered Beacons and can clear corruption blocking certain paths.Current online guides disagree about the exact Ova threshold required for this unlock, so it is safer to keep cleansing Beacons and regularly return accumulated Ova rather than relying on one disputed number.
Spend Gloom Before Dangerous Encounters
Gloom is earned by defeating enemies and is used to improve the Harbinger at Beacons. When you die, carried Gloom is left at the death location. You normally have one opportunity to retrieve it; dying again before recovery can erase the previous amount permanently.
Develop these habits:
Level up whenever you have enough Gloom.
Spend it before entering an unfamiliar dungeon.
Do not carry a large reserve into a boss arena.
Check the map for the recovery marker after dying.
Use a Sidearm if dropped Gloom appears visible but physically unreachable.
The developers have investigated cases where Gloom could become difficult to recover after falling from cliffs. Until those situations are completely resolved, spending Gloom before exploring dangerous vertical areas is particularly sensible.
Upgrade Mether’s Pulse Early
Mether’s Pulse is the main rechargeable healing resource. Resting at a Beacon restores its uses, but the starting version offers limited protection during long routes.
Two upgrades improve it:
Revered Gland increases the number of Mether’s Pulse uses.
Synaptic Vessel increases the health restored per use.
Both can be applied while resting at a Beacon. Merrick in Marrow Keep sells an early Revered Gland and Synaptic Vessel for 1,500 Coins each, according to current location guides.Ordinary items can also restore health or remove status effects. Save Pulse charges by using appropriate inventory items between encounters, but avoid consuming rare items before checking whether their Passive effect would be more valuable.
Develop Weapons and Tarstones Together
Do not spend hours chasing an endgame weapon when a properly upgraded early weapon can already support your build. The Axe and Dagger is available early, attacks quickly, and combines well with effects triggered by repeated hits.
Before investing, test:
Attack speed
Range
Heavy-attack recovery
Enemy tracking
Break Damage
Sidearm compatibility
Tarstone interactions
Tarstones can improve critical hits, elemental infusions, Break, defense, Sidearm charging, and special abilities. GamesRadar reports that players can equip up to ten Tarstones and change them without resting at a Beacon.The Mobalytics progression guide recommends rotating multiple Tarstones. Higher upgrades require materials generated while developing other stones, meaning that focusing exclusively on one Tarstone can create a progression bottleneck.
Understand Active, Passive, and Familiarity Effects
Many inventory items provide different effects depending on where they are equipped.An Active item might immediately restore health or remove Poison, while its Passive version could provide regeneration, damage reduction, or another continuous bonus. Familiarity improves as more copies of an item are discovered, strengthening its long-term effect.
Whenever you find a new item:
Read both its Active and Passive descriptions.
Check whether it removes a specific status effect.
Compare it with your current Shell and Tarstones.
Keep useful defensive Passives for unknown areas.
Switch to damage effects only when survival is comfortable.
Exploration therefore increases power even when a chest does not contain a new weapon. Consumables, Familiarity progress, hidden Tarstones, and healing upgrades all contribute to a stronger build.
Treat Difficulty-Changing Items Carefully
Players struggling with combat can find the Slayer Seal in Marrow Keep near Merrick’s room. It greatly increases Sidearm Break Damage and provides powerful Riposte benefits, effectively functioning as an easier mode.However, equipping it permanently disables achievements and trophies for that playthrough. The game provides two warnings, but removing the Seal afterwards does not reverse the restriction. Completionists should save it for a second playthrough.Night Mode provides the opposite experience by increasing danger, enemy presence, and rewards while adding exclusive content. New players should complete several areas and establish a functioning build before activating it.
Final Advice
A successful first journey through Mortal Shell II depends less on endless grinding and more on understanding how its systems interact. Choose a Shell you enjoy, match it with an appropriate Seal, upgrade a comfortable weapon, and select Tarstones that support the same combat plan.Cleanse Beacons, spend Gloom before risky encounters, improve Mether’s Pulse, and remain willing to change routes when an area feels disproportionately difficult. Players looking for another way to get started can also explore Cheap Mortal Shell II Account options that suit their needs. Once Harden, Break, Riposte, and Shell progression begin working together, the early game becomes considerably more manageable.









SUPPORT
LEGAL
Policies






 USD ($)
 English
  Help Center