


Star Wars Zero Company


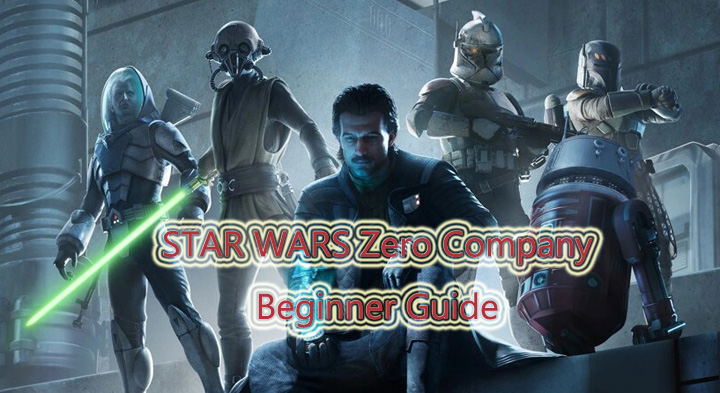
STAR WARS Zero Company combines turn-based tactical combat with squad management, character progression and strategic decisions between missions. Players take command of Hawks and Zero Company during the Clone Wars, building a squad of Operators with different Specializations, weapons and abilities while dealing with the mysterious Infinite Coil.
Players familiar with XCOM will recognize ideas such as cover, tactical positioning and optional permadeath, but Zero Company introduces its own systems, including Advantage, Backup, Bonds and a strategic hub known as The Den. Learning how these mechanics interact is more important than simply finding the weapon with the highest damage.
For players starting their first campaign, the following tips can make the opening hours considerably easier. They can also Buy Star Wars Zero Company Account on Z2U before beginning their tactical journey to get a different starting point.
Understand the Main Systems Before Chasing the Best Build
One of the easiest mistakes to make is immediately searching for the strongest class or weapon without understanding how Zero Company's systems fit together.
Combat revolves around several interconnected resources and mechanics.
| System | What It Means for Beginners |
|---|---|
| Action Points | Determine how much an Operator can move, attack or use abilities during a turn |
| Advantage | A squad resource generated through combat and used for powerful actions |
| Backup | Allows Operators to cooperate in attacks |
| Cover | Reduces the risk of taking enemy fire and makes positioning important |
| Bonds | Relationships between Operators that can unlock combat benefits |
| Specializations | Define the tactical role and abilities of Operators |
| Operations | Strategic activities that can affect resources and enemy development |
| The Den | Your main hub for managing Operators, equipment, progression and missions |
| Permadeath | Optional rule that can make battlefield losses permanent |
Understanding these systems first makes later decisions about weapons, Specializations and squad compositions much easier.
Plan the Entire Turn Before Spending AP
Action Points are among the most important resources in every battle.
A common beginner mistake is moving the first Operator immediately after the turn begins. That movement might look harmless, but it can reveal enemies, create a poor firing angle or leave that Operator without enough AP to respond effectively.
Instead, inspect the battlefield before committing.
Ask several questions:
Which enemies represent the biggest immediate threat?
Which Operator can create the best opening attack?
Can another Operator provide Backup?
Does anyone need to reposition into cover?
Can you eliminate an enemy completely this turn?
Will anyone be exposed when the enemy begins acting?
Try to think about the squad's actions as one coordinated sequence rather than four separate turns.
For example, one Operator might create Vulnerable on a dangerous target, another can contribute through Backup, and a third can finish the target. The exact combination depends on your squad, but the principle remains the same: plan first and spend AP second.
Do Not Rush Into Unexplored Areas
Aggressive movement can quickly turn a controlled encounter into a dangerous one.
Moving too far forward may expose additional enemies while part of your squad has already spent its AP. That creates an especially bad situation because newly discovered threats can potentially act before you have properly repositioned everyone.
Advance methodically instead.
Use cover, maintain reasonable distances between squad members and avoid sending one Operator far ahead without support. When the current group of enemies is almost defeated, think carefully before using your final available actions to explore deeper into the map.
This becomes even more important when playing with permadeath enabled. Losing an Operator can have consequences beyond a single mission because squad members are connected to progression, relationships and potentially story content.
Focus Fire Instead of Damaging Everyone
Removing enemies from the battlefield is usually more valuable than spreading damage across several targets.
Consider two possible outcomes:
Situation A
Enemy 1: 30% HP
Enemy 2: 30% HP
Enemy 3: 30% HP
Enemy 4: 30% HP
Situation B
Enemy 1: Defeated
Enemy 2: Defeated
Enemy 3: Full HP
Enemy 4: Full HP
Situation B will often be safer because only two enemies remain capable of acting.
This becomes particularly important against enemies with defensive mechanics. If a target can recover protection or otherwise become harder to eliminate later, spreading damage can waste your previous attacks.
Before attacking, therefore, ask whether your squad can completely remove one important enemy rather than simply reducing several health bars.
Learn How to Use Backup
Zero Company strongly rewards cooperation between Operators, and Backup is one of the mechanics new players should learn early.
Instead of thinking of every squad member as an independent damage dealer, look for opportunities to combine their actions against priority targets.
A coordinated sequence might look something like this:
Identify the most dangerous enemy.
Use one Operator to create a favorable combat condition.
Call on another squad member through Backup.
Follow with additional damage if necessary.
Reposition surviving Operators before ending the turn.
The exact abilities involved will change depending on your characters and builds, but coordinated attacks can often produce better results than having every Operator engage a different enemy.
This philosophy becomes increasingly important as your squad develops additional abilities and Bonds.
Scoundrel Is a Strong Starting Specialization
Players who are unsure what to choose for Hawks have several viable options, but Scoundrel is currently one of the strongest early recommendations.
Its value comes from team-oriented abilities rather than simply maximizing Hawks' personal damage.
Scoundrel can help create Vulnerable targets, improve Assist Damage and contribute to overcoming enemy defenses. This complements Hawks' leadership-oriented abilities and makes it easier for other Operators to capitalize on openings.
That makes Scoundrel particularly attractive for beginners learning how squad synergies work.
Gunslinger is another useful alternative for players who prefer a more offensive ranged style. It can offer strong ranged pressure and tools for dealing with multiple enemies.
The important point, however, is that there is no reason to panic about choosing the "perfect" Specialization immediately.
Experiment With Builds Instead of Restarting
Zero Company gives players room to reconsider early build decisions.
Specialization changes become available relatively early in the campaign, around Cycle 3, giving players an opportunity to rebuild characters after gaining practical experience with the combat system.
This is particularly useful for beginners.
You might initially choose a class because its description sounds powerful, only to discover that another role fits your preferred squad much better.
Instead of restarting the campaign, experiment.
You can use the opening Cycles to answer questions such as:
Do you prefer aggressive or defensive combat?
Does your squad need more single-target damage?
Are you struggling with survivability?
Would additional support abilities improve your team?
Do you need better ranged options?
Which Operators naturally work well together?
Once you understand these answers, rebuilding becomes much easier.
Match Weapons With Your Specialization
Do not automatically equip a weapon simply because it displays a larger damage number.
Zero Company features different weapon categories designed for different tactical roles, including Blaster Pistols, Blaster Rifles, Repeaters and Longarm Blasters.
A weapon becomes much more valuable when it complements the Operator's Specialization, abilities and intended battlefield role.
For example, an Operator designed around long-range single-target attacks will have different priorities from one intended to pressure several enemies or provide close-range support.
A useful way to think about character building is:
Specialization → Talents → Weapon → Squad Role
Rather than:
Highest Damage Weapon → Everything Else
This approach produces Operators with clearly defined purposes and makes it easier to coordinate the entire squad.
Build a Balanced Squad, Not Four Damage Dealers
Damage is important, but a squad consisting entirely of characters focused on direct attacks can become difficult to manage when a mission introduces unusual objectives or dangerous positioning.
Try to create role coverage.
A beginner-friendly squad should generally have ways to provide:
Reliable damage
Long-range pressure
Support or recovery
Enemy control or debuffs
AP or Advantage support
Safe finishing attacks
Hawks can also help compensate for weaknesses depending on the chosen Specialization.
You do not need to follow a rigid tier list. The better approach is to identify what your current team cannot do and use Specializations or recruited Operators to fill those gaps.
Do Not Ignore Bonds
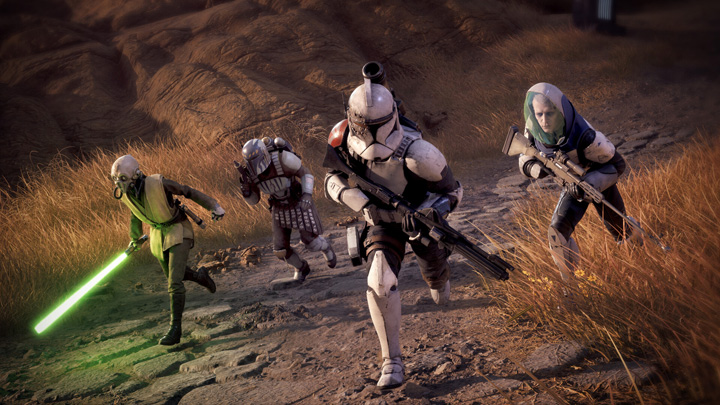
Bonds are not simply a dialogue or role-playing feature.
Operators who repeatedly work together can develop relationships that provide meaningful gameplay benefits. As Bonds improve, they contribute to combat synergy and character progression.
This creates an important strategic decision.
Constantly changing your entire squad may give you access to more characters, but consistently deploying compatible Operators together can develop stronger relationships.
That does not mean you should never rotate your roster. Injuries, mission requirements and different enemy types may require changes.
Instead, try to establish a few reliable partnerships within the company.
When two Operators perform particularly well together, consider deploying them together regularly and developing that relationship rather than treating every mission as a completely new squad composition.
Spend Time at The Den Between Missions
The Den should not be treated as a decorative lobby between battles.
It is the center of Zero Company's strategic layer and provides opportunities to prepare for future missions.
After returning from combat, make a habit of checking several things before immediately deploying again:
Talk to important squad members.
Check injuries and recovery.
Review newly acquired equipment.
Examine available upgrades.
Spend progression resources when appropriate.
Review your Operators and Specializations.
Check available Operations.
Study upcoming mission choices.
Character conversations are particularly worth remembering. Talking to your companions provides additional information about their backgrounds and can contribute to the broader character-driven side of the campaign.
Think of every visit to The Den as preparation for the next battle.
Pay Attention to Operations
Another mistake is treating everything outside the main story as optional filler.
Operations are part of the strategic layer and can influence how the campaign develops.
Some strategic choices can prevent or affect enemy improvements, while ignoring available opportunities can leave you facing stronger opposition later.
That means the correct question is not simply:
"Which mission gives me the biggest immediate reward?"
You should also consider:
"What happens if I ignore this Operation?"
Resources, enemy development, squad availability and campaign progression are connected. A choice that seems less rewarding immediately may make future missions easier.
This is one of the biggest differences between thinking tactically and thinking strategically in Zero Company.
Consider Playing Without Permadeath First
Players experienced with XCOM or similar tactical games may immediately enable permadeath for additional tension.
Newcomers do not necessarily need to do the same.
Zero Company already gives beginners several systems to learn simultaneously:
AP management
Cover and positioning
Advantage
Backup
Specializations
Weapons and equipment
Bonds
Operations
The Den
Squad development
Learning all of these while permanent character loss is active can make early mistakes unnecessarily punishing.
A first campaign without strict permadeath can therefore serve as an opportunity to understand the game's tactical language.
Once you know how enemies behave and how your Operators interact, a later permadeath campaign can provide a much more interesting challenge.
Final Tips for Your First Hours
The most important lesson in STAR WARS Zero Company is that individual strength matters less than coordinated decision-making.
Before every deployment, remember this simple checklist:
Review your squad before leaving The Den.
Make sure injured Operators are handled appropriately.
Check weapons and Specializations.
Look at Operations before choosing the next mission.
Read the mission objective carefully.
Examine the battlefield before spending AP.
Keep Operators in useful cover whenever possible.
Avoid rushing blindly into unexplored areas.
Focus fire on dangerous targets.
Use Backup and other cooperative abilities.
Build Bonds between Operators who work well together.
Do not be afraid to experiment with different builds.
STAR WARS Zero Company may initially look complicated because its tactical battles, character relationships and campaign management systems are all connected. However, beginners do not need to master everything immediately.
Start by learning how AP, positioning and coordinated attacks work. Then gradually experiment with Specializations, weapons, Bonds and Operations as the campaign develops. Players who prefer to explore alternative starting options can also find Cheap Star Wars Zero Company Accounts on Z2U while comparing available account listings and offers.
Once those systems begin working together, Zero Company becomes much less about simply surviving individual firefights and much more about building a squad capable of responding to whatever the galaxy throws at it.









SUPPORT
LEGAL
Policies






 USD ($)
 English
  Help Center